Unit 1 - Introducing ESP32
Introduction
This unit is an introduction to the ESP32 which is the ESP8266 successor. The ESP32 is loaded with lots of new features. It now combines Wi-Fi and Bluetooth wireless capabilities.
There are a lot of ESP32 development boards. I encourage you to visit the ESP32.net website where each ESP32 chip and development board are listed. You can compare their differences and features.
Introducing the ESP32 DOIT DEVKIT V1 Board
For this course, we'll be using the ESP32 DEVKIT V1 DOIT board, but any other ESP32 with the ESP-WROOM-32 chip will work just fine.
Here's just a few examples of boards that are very similar and compatible with the projects that will be presented throughout this course.
Features
Let's take a closer look at the board.
- ESP-WROOM-32 chip.
- 3.3V voltage regulator that drops the input voltage to power the ESP32 chip.
- CP2102 chip
- has two on-board buttons: ENABLE and BOOT button
Specifications
- The ESP32 is dual core, this means it has 2 procesors.
- It has Wi-Fi and bluetooth built-in.
- It runs 32 bit programs.
- The clock frequency can go up to 240MHz and it has a 512kB RAM.
- This particular board has 30 pins, 15 in each row. (There's a new version of this board with 36 pins.)
- It also has wide variety of peripherals available, like: capacitive touch, ADCs, DACs, UART, SPI, l2C and much more. We'll explore these functionalities later in the course.
ESP32 Pinout
Programming Environments
The ESP32 can be programmed in different programming environments. You can use the Arduino IDE, Espressif IDF (IoT Development Framework), Micropython, Javascript, LUA, etc. Throughout this course will be focusing mainly on programming the ESP32 with the Arduino IDE.
Unit 2 - Installing ESP32 in Arduino IDE
1. Installing the ESP32 Board
To install the ESP32 board in your Arduino IDE, follow these next instructions:
1) Open the preferences window from the Arduino IDE. Go to File then Preferences.
2) Enter https://dl.espressif.com/dl/package_esp32_index.json into the "Additional Board Manager URLs" field as shown in the figure below. Then, click the "OK" button.
3) Open boards manager. Go to Tools > Board > Boards Manager...
4) Search for ESP32 and press install button for the "ESP32 by Espressif Systems".
Testing the Installation
Plug the ESP32 DOIT DEVKIT V1 Board to computer. Then, follow these steps:
1) Open Arduino IDE
2) Select your Board in Tools > Board menu. In this case, choose the DOIT ESP32 DEVKIT V1.
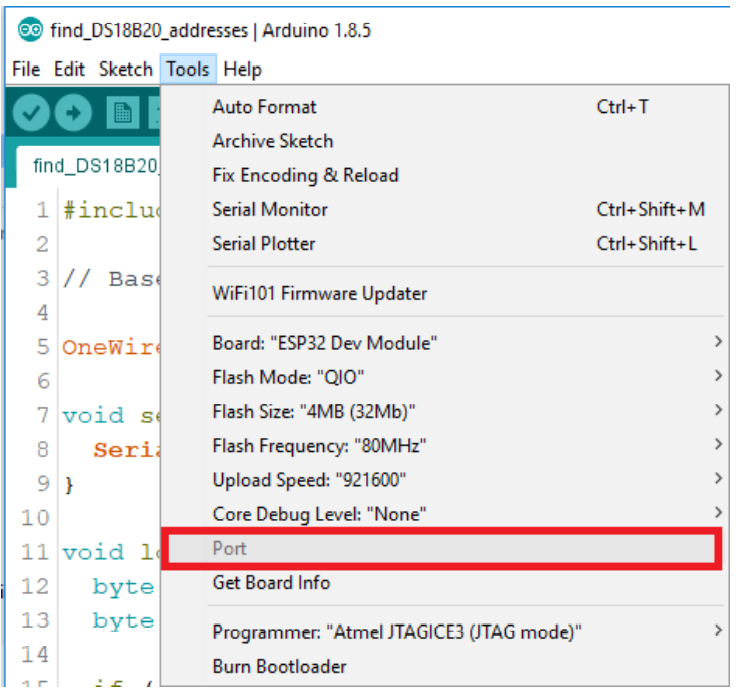
3) Select the Port.
4) Open the following example under File > Examples > Wifi (ESP32) > WiFi Scan
5) A new sketch opens:
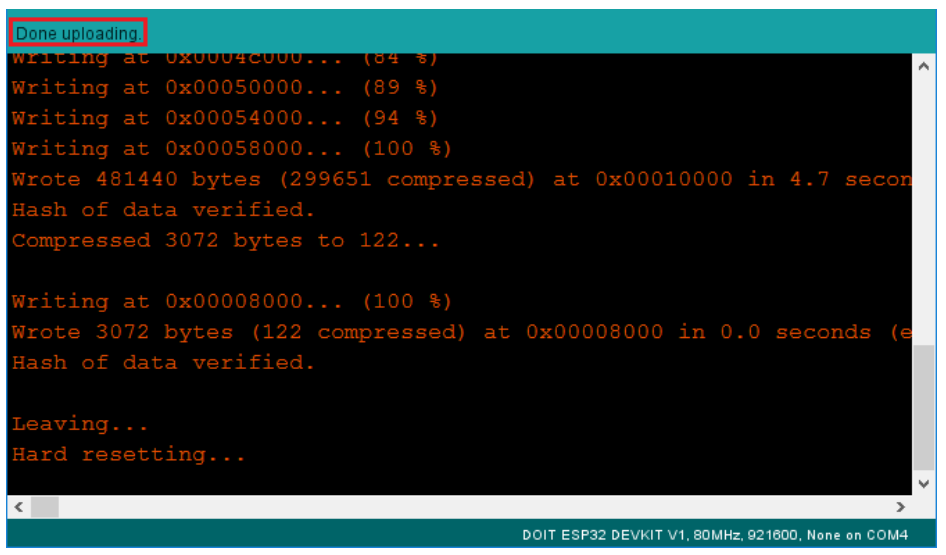
6) Press the Upload button in the Arduino IDE. Wait a few seconds while the code compiles and uploads to your board.
7) If everything went as expected, you should see a "Done uploading", messsage.
8) Open the Arduino IDE Serial Monitor at a baud rate of 115200:
9) Press the ESP32 on-board Enable button and you should see the networks available near your ESP32:
Troubleshooting Tip #1
"Failed to connect to ESP32: Timed out... Connecting.."
When you try to upload a new sketch to your ESP32 and it fails to connect to your board, it means that your ESP32 is not in flashing/uploading mode. Having the right board name and COM por selected, follow these steps:
- Hold-down the "BOOT" button in your ESP32 board.
- Press the "Upload" button in the Arduino IDE to upload a new sketch:
After that, you should see the "Done uploading" message.
Troubleshooting Tip #2:
COM Port not found/not available
If you plug your ESP32 board to your computer, but you can't find the ESP32 Port available in your Arduino IDE (it's grayed out):
1. If you don't see your ESP's COM port available, this often means you don't have the USB drivers installed. Take a closer look at the chip next to the voltage regulator on board and check its name.
2. If you have the drivers installed, but you can't see your device, double-check that you're usnig a USB cable with data wires. USB cables from powerbanks often don't have data wires (they are charge only). So, your computer will never establish a serial communication with your ESP32. Using a proper USB cable should solve your problem.